Quick Answer:
The types of plackets include continuous bound, two-piece, French, concealed, shirt, sleeve, and zipper plackets. Each one serves a specific purpose in garment construction, from providing clean openings for buttons to creating neat sleeve vents. Knowing each type helps fashion students make smarter design and sewing decisions.
Quick Overview:
| Placket Type | Primary Use | Skill Level | Key Feature |
| Continuous Bound | Sleeve openings, cuffs | Beginner | Single fabric strip |
| Two-Piece / Faced | Shirts, kurtas | Intermediate | Clean, structured finish |
| French Placket | Formal dress shirts | Intermediate | Hidden button strip |
| Concealed Placket | Formal wear, suits | Advanced | Buttons hidden inside |
| Shirt / Front Placket | Casual & formal shirts | Beginner–Intermediate | Visible button band |
| Zipper Placket | Trousers, skirts, dresses | Intermediate | Zipper-based closure |
Table of Contents
1. Introduction
2. What is a Placket?
3. Importance of Plackets in Garment Construction
4. Types of Plackets in Garment Construction
5. Where Plackets Are Used in Garments
6. Basic Placket Construction Process
7. Tools and Materials Needed
8. Common Mistakes Beginners Should Avoid
9. Tips to Learn Placket Sewing Effectively
10. Career Learning Value for Fashion Design Students
11. Conclusion
12. FAQs
Introduction
If you are a fashion design student stepping into the world of garment construction, plackets are one of the first technical details you will encounter. They appear on shirts, sleeves, trousers, and dresses, and yet many beginners overlook how much they contribute to both function and finish. Understanding the types of plackets is not just a technical skill. It shapes how confident you will feel when you construct, alter, or design a garment from scratch.
What is a Placket?
A placket is a layered or folded fabric strip that creates an opening in a garment. This opening allows you to put on and take off the garment with ease. It is typically reinforced with interfacing and finished with buttons, snaps, hooks, or a zipper. A well-sewn placket meaning in garment terms goes beyond aesthetics, it is a structural element that holds the garment together at key stress points.
Whether it is a crisp shirt placket running down the front of a formal shirt or a tiny sleeve placket near the cuff, every placket has a specific construction method and a design purpose.
Importance of Plackets in Garment Construction
Plackets might seem like a little feature, but they serve a number of important functions in garment making:
- Ease of dressing: They provide openings at necklines, sleeves, and waistbands.
- Structural strength: They add strength to high-stress regions to minimise ripping.
- Aesthetic finish: A clean placket elevates the overall look of a garment.
- Design versatility: Different placket styles allow for varied fashion expressions, from casual to formal.
For students enrolled at the Best Fashion Designing Colleges in Coimbatore, learning placket construction is a core part of the apparel design curriculum.
“Placket construction is one of those skills that separates a well-finished garment from a mediocre one. Master it early, and everything else becomes easier.” – Garment Construction Principle.
Types of Plackets in Garment Construction
Here is a clear breakdown of all the main types of plackets you will encounter in fashion designing and apparel construction:
1. Continuous Bound Placket (One-Piece Placket)
The continuous placket is the most beginner-friendly option. It is made from a single strip of fabric folded and stitched around a slash or slit in the fabric. You will most commonly find it on sleeve placket openings near the cuff, on children’s garments, and on lightweight fabrics.
- Covers both sides of the slit in one strip
- Rapid construction with minimum wastage of material.
- Great for beginners to master the basic stages in stitching a placket
Action: Make a muslin sample of this placket before making it in your real fabric.
2. Two-Piece Placket (Bound and Faced Placket)
The two piece placket is two independent pieces of cloth, one for the outside and one for the facing. It makes it appear more finished, more polished than the single-piece version. It is often used in kurtas, ethnic blouses and casual shirts where a clean neckline opening is required.
- Offers a cleaner, more defined edge than a one-piece design
- Ideal for fabrics that fray easily, as facing controls raw edges
- Slightly more complex but very rewarding for intermediate students
Action: Study the difference between the overlap and underlap sides before cutting your fabric.
3. French Placket
The French placket is a refined style where the button strip is created by folding the shirt fabric itself, not by adding a separate piece. This gives it a very neat, flat appearance that is popular in formal dress shirts and high-end menswear. The stitching line is visible on the outside, giving it a distinctive, classic look.
- Made from the self-fabric of the garment front
- Requires careful folding, pressing and top-stitching
- Gives shirts a quality, fitted look
Action: Iron every fold flat before stitching; nothing is more important at this stage.
4. Concealed Placket
A concealed placket shirt hides the buttons entirely behind a flap of fabric. From the outside, the shirt front appears clean and seamless. This is a hallmark of formal and luxury garments where clean lines and minimalism are preferred. It takes more time to construct but delivers an elegant, high-fashion result.
- Buttons are entirely invisible from the front
- Structured blouses, formal outfits, dress shirts
- Needs careful marking and sewing to make the hidden closure line up properly
Action: With the tailor’s chalk, mark the position of your buttons precisely before sewing the hidden band.
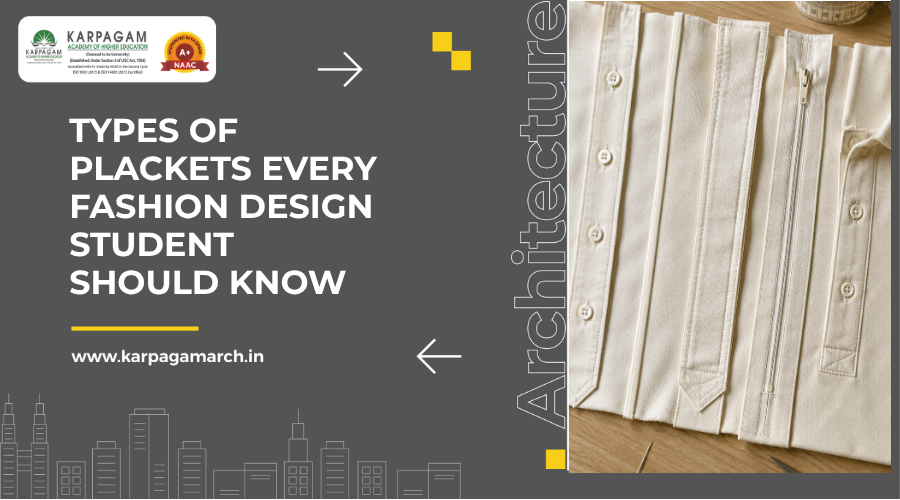
5. Shirt Placket / Front Placket
The front placket is the most recognizable type. It is the visible button band running down the front of a shirt. The button placket adds structure to the shirt’s centre front and houses the buttonholes on one side and the buttons on the other. It can be cut as part of the shirt front or applied as a separate band.
- Can be cut-on (self-facing) or sewn-on (separate strip)
- Commonly used in formal, casual, and sports shirts alike
- Interfacing is always applied to add body and durability
Action: Always interface your placket band before construction to prevent stretching or warping.
“The front placket is the backbone of shirt construction. A garment can have a beautiful collar and fine fabric, but a poorly made placket will ruin the entire piece.”
6. Sleeve Placket
A sleeve placket is the small opening near the cuff of a shirt that allows the sleeve to slip over the hand. It is one of the smallest plackets in garment construction, but it demands neat, precise work. There are several variations: the classic tower placket, the continuous bound style, and the simple hemmed slit.
- Tower placket is the most common in formal shirts
- Bound version is faster and suited to casual garments
- Precision in clipping corners is key to a clean result
Action: Practice clipping the corner of your sleeve slit, clip as far as possible without cutting your stitching.
7. Zipper Placket
The zipper placket replaces the button closure with a zipper hidden behind a folded fabric flap. It is most commonly found in trousers, skirts, and dresses. The faced placket technique is often used here, where an inner facing layer keeps the zipper hidden from view while also finishing the raw edges neatly.
- Lapped zipper placket and fly-front are the most used variations
- Used heavily in trousers, jeans, formal skirts, and evening gowns
- Requires accurate basting and topstitching for a professional result
Action: Always baste your zipper in place before permanent stitching to check for alignment and puckering.
Where Plackets Are Used in Garments
Different garments call for different placket types. Here is a quick reference:
| Garment | Placket Type Used | Purpose |
| Formal Shirt | French / Concealed Placket | Clean, polished look |
| Casual Shirt | Shirt / Front Placket | Easy button access |
| Kurta / Ethnic Wear | Two-Piece Placket | Structured neckline opening |
| Trousers / Skirts | Zipper Placket | Secure functional closure |
| Sleeve / Cuff | Continuous Bound Placket | Neat sleeve vent finish |
Basic Placket Construction Process
When you know how a placket is constructed, you will have the confidence to handle any style of placket. The basic steps ( that apply to most plackets ) are below :
- Mark the opening clearly. Mark the slit or opening using chalk or a marking pen.
- Cut the interfacing to reinforce the placket strip for structure and stability.
- Fold and press. Fold the placket strip to the desired width and press each fold flat with an iron.
- Pin and baste. Pin the placket and baste before the final stitch.
- Stitch & trim: Sew the seams and trim excess, and clip corners as necessary.
- Press and finish: Press the placket flat and topstitch for a clean edge.
Tools and Materials Needed for Making Plackets
| Tool / Material | Purpose |
| Fabric scissors | Cutting placket strips cleanly |
| Pins & clips | Holding pieces in place before stitching |
| Sewing machine | Straight stitch and edge finishing |
| Iron & pressing cloth | Pressing seams and folds flat |
| Interfacing | Giving structure to placket band |
| Seam ripper | Correcting stitching mistakes |
Common Mistakes Beginners Should Avoid
- Skipping interfacing: Without it, your placket will look floppy and unprofessional.
- Cutting the slit too deep: Always mark and cut carefully, you cannot undo a cut that is too long.
- Not pressing at every stage: An iron is your best friend in placket construction.
- Misaligning buttons and buttonholes: Mark both sides together before stitching.
- Using the wrong placket type: Match your placket style to the garment design and fabric weight.
Tips to Learn Placket Sewing Effectively
- Practice the continuous bound placket until you are comfortable with it.
- Practice on scrap cloth before you start on your final outfit.
- Watch construction videos with manuals. Visual learning accelerates skill gain.
- Press every fold before stitching. A flat placket is always a clean placket.
Career Learning Value for Fashion Design Students
Placket construction may seem like a small chapter in your garment studies, but it carries significant weight in your career. Brands, ateliers, and production houses assess technical finishing quality, and a perfectly sewn placket signals that you understand placket finishing techniques at a professional level. Whether you pursue fashion design, pattern making, or garment production, this skill is non-negotiable.
Students who invest time in mastering these construction techniques during their diploma or degree programme will find themselves better prepared for industry roles. If you are considering where to develop these hands-on skills, exploring programmes at the Best Fashion Designing Colleges in Coimbatore is a great starting point for a structured garment construction education.
Conclusion
Understanding the types of plackets is a foundational step for every fashion design student who wants to build real industry skills. From the simple continuous bound placket perfect for beginners to the refined French and concealed styles used in luxury garments, each placket type teaches you a new dimension of garment construction. The more you practise, the more intuitive placket construction becomes.
“Learn each step, and understand it properly. Start with the basics. Always press your folds properly, apply interfacing where needed, and don’t rush the process. With consistent practice and patience, you will become confident in making different types of plackets and develop the technical skills that can offer you an edge in your fashion design profession.
Build your foundation in garment construction and fashion design with the right academic training.
Apply now and begin your journey toward a creative career in fashion.
Frequently Asked Questions (FAQs)
1. What are the different types of plackets?
The main different types of plackets are the continuous bound (one-piece), two-piece, French, concealed, shirt or front placket, sleeve placket, and zipper placket. Each type varies in construction method, fabric requirements, and the garment it is most suited for. Students should learn each type progressively, starting with the continuous bound.
2. What is a placket in garment construction?
A placket meaning in garment construction refers to a layered or reinforced fabric strip that creates a finished opening for closures such as buttons, snaps, or zippers. It is sewn into necklines, sleeve cuffs, trouser fronts, and shirt fronts to provide both function and a clean, professional finish to the garment.
3. What are shirt plackets used for?
A shirt placket is used to create a structured, reinforced band at the front of a shirt where buttons and buttonholes are placed. It holds the shirt closed, adds body and stiffness to the front opening, and contributes to the overall visual neatness. French and concealed plackets are popular choices for formal shirts requiring a sleek appearance.
4. What is the difference between one-piece and two-piece plackets?
One piece or continuous placket: A single strip of fabric folded over the slit to finish both sides. A two piece placket involves two different pieces of cloth, an outer piece and a facing, which results in a more structured and defined finish. The two-piece is the best option for a cleaner, more fitted edge, especially in heavier or more formal fabrics.
5. Which type of placket is easy for beginners to learn?
The continuous bound placket is often the easiest style for beginners to learn. It’s made from one strip of fabric and it’s easy to learn and practice simple folding and stitching methods. Commonly found on sleeve openings and lightweight clothing, it offers a good introduction to placket construction before moving onto the more complicated types like French, concealed or zipper plackets.
6. What is a faced placket?
A faced placket has a separate facing piece stitched onto the inside of the placket opening for a neat hidden finish. Often utilized in zip plackets and defined necklines. The facing covers raw edges and offers a degree of rigidity. This technique is widely used in both custom and ready-to-wear garment production.