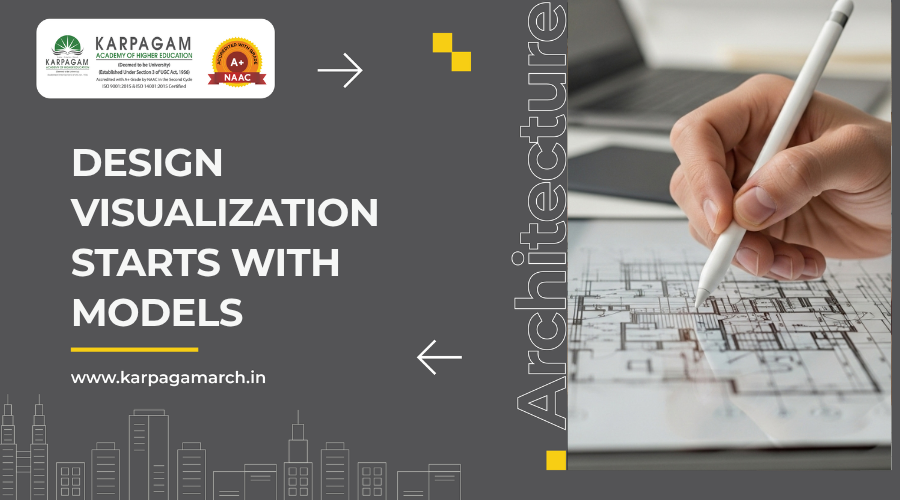
Introduction
You know what, nothing beats holding an idea in your hands. A sketch tells a story. A render impresses a room. But a scale model lets you walk around it, tilt it to catch the light, and feel its corners with your fingertips. That small act changes conversations. People point, ask better questions, and suggest smarter fixes. It is the moment design turns from ‘maybe’ to ‘real’.
This shift to physical models is especially crucial for students. As you juggle classes, labs, and deadlines, adding a scale model might seem like extra work. Paradoxically, it can actually save you time by catching mistakes early and helping a jury or sponsor see your thinking without scrolling through endless slides. It’s less talk, more show—and a smarter use of your resources.
Seeing is Believing – How Miniatures Reduce Guesswork
Let’s look at how models help eliminate uncertainty. Our eyes are drawn to depth and shadow, and a physical miniature offers both in ways a screen cannot. Move a mini product across a table—now you sense proportions. Are those buttons too close? Does the handle bite your palm? Does the airflow make sense when you trace it with a pencil? These questions are hard to answer on a flat screen.
Models also reveal spatial clashes. Mechanical teams catch fasteners that hit ribs. Architecture students spot an awkward corridor. Industrial designers see that a curve looks heavy in real light. Creating an impressive architecture sketch alongside the model can further clarify design intent and communicate ideas effectively. The model acts like a low-cost truth teller. It will not flatter a bad idea, which is exactly what you need.
Choosing the Right Scale – a Simple Rule You Can Trust
Scale is a ratio between the real object and the model. Pick it based on the smallest feature you must show. If your smallest critical detail is 5 mm in real life, and your printer can reliably make 0.5 mm walls, a 1:10 model keeps that feature visible. When in doubt, test two tiny fragments at different scales. The fragment that reads well decides the scale for the whole.
Use consistent conventions across your team. Label every base with the scale, orientation arrow, and date. That tiny label prevents confusing critiques and messy measurements.
Materials and Methods – Foam, Wood, Resin, and Print
Every material speaks a little differently. The foam board slices fast and forgives mistakes. Basswood sands to clean edges and stains well. Acrylic shows light paths for concepts like lamps or water flow. PLA and resin carry fine detail for gears, textures, and snap fits.
Pick the material that reveals the question you are asking. If your concern is massing, go simple and light. If your concern is fit, print the joint and test it. If your concern is light, try a frosted sheet and a small LED. You are not building a trophy. You are building a thinking tool. Considering eco-friendly materials for sustainable architecture can also elevate your model, showing awareness of design impact and environmental responsibility.
Digital to Physical – CAD, Slicing, and Shop Etiquette
Most student teams begin in CAD. Autodesk Fusion 360 and SolidWorks both give strong student access. Model with intent. Separate parts that will be printed in different orientations. Add fillets where stress concentrates. Name features clearly so a teammate can edit your work without calling you at midnight.
Understanding the types of architectural drawings can also guide your CAD work, helping you translate plans, elevations, and sections into accurate 3D models.
For prints, slice with Cura or PrusaSlicer and choose settings that match your aim. Need speed for a quick check. Low infill, thick layers. Need details for a showpiece. Finer layers, slower speed, patience. Keep a build log with nozzle temperature, material type, and failures. That log saves the future you.
Shop etiquette sounds boring, but it is a design culture. Wear glasses when you cut. Keep blades sharp. Vacuum chips. Return drill bits to the right bin. A clean shop builds better models and better teams.
Related: https://karpagamarch.in/understanding-3d-house-rendering-and-its-types/
Collaboration Magic – How Models Speed Decisions
A model invites hands into the process. Stakeholders who felt quiet during slide reviews start talking when they see a mini. They rotate the base, ask what happens if the lever moves here, and imagine how a child or an elder would use the thing. Those comments are gold. You cannot buy that clarity with a long PDF.
For student startups, a scale model can open doors. Bring one to the college incubation center. Mentors quickly understand constraints when the object is on the table. You can place a tiny brochure stand next to it with a QR code that links to your GitHub repo, bill of materials, and a cost sheet in Google Workspace. Now your story has shape and proof. This hands-on collaboration perfectly aligns with the design thinking process, where prototyping and feedback drive innovation and better solutions.
The Small Contradiction – Virtual First, Yet Tangible Wins
Yes, advanced visualization is strong. You can walk through structures in VR and simulate loads that would crush a physical prototype. That is real power. Still, a small object can do what a headset cannot. It moves through real light. It joins a meeting without setup. It invites touch. The contradiction is not a fight. It is a partnership. Use virtual to narrow choices. Use physical evidence to finalize judgment.
Starter Kit for Students – One Short List of Tools and Steps
- Pick A Purpose: Write one sentence. “This model tests handle comfort and reach.” Purpose drives scale and material.
- Choose The Toolchain: Fusion 360 or SolidWorks for CAD, Cura or PrusaSlicer for slicing, a lab 3D printer or laser cutter for output.
- Run a Fragment First: Print or cut only the hardest part. If the fragment works, scale the rest.
- Document As You Build: Store STL files, a bill of materials, and notes on GitHub; keep a shared feedback sheet in Google Workspace.
- Show and Ask: Place the model in front of peers or mentors at your incubator. Ask for three changes, not thirty.
Related: https://karpagamarch.in/top-architecture-thesis-projects-for-students/
Care, Safety, and Ethics — Build Clean, Credit Sources
Good models respect safety and time. Ventilate when you glue or paint. Let the resin cure fully before you pass the model around. Do not leave cutters on the edge of a table. When you borrow a design fragment or a parametric trick from a forum, credit the source in your repo. That habit protects you when your work becomes public.
If your model suggests a product that touches regulated spaces like medical use, mark it clearly as a non-functional mock. People listen to models. That influence is a privilege. Use it with care.
Wrap Up – Make It Small to Think Big
A scale model is not a miniature promise of the final product. It is a thinking aid. It helps you find what matters, cut what does not, and tell a story that busy people can follow. Build one early for your next project. Keep it rough. Let it earn its next layer of polish by answering a question. When you put a small object on a big table, you invite better design. That is the quiet power of scale.
Many design students, especially those from the top architecture colleges in Coimbatore, use scale models as a core part of their learning, turning ideas into tangible forms that sharpen creativity and problem-solving.
About Karpagam Architecture
Karpagam Architecture is one of the premier architecture colleges in Coimbatore, offering a dynamic learning environment. Our institution is dedicated to providing top-quality education, fostering creativity, and developing innovative architects for the future.
With a focus on hands-on experience and industry-relevant knowledge, we empower students to excel in the field of architecture. Join us to unlock your potential and shape a successful career in architecture.